My logo

FB

Saturday, December 3, 2011

How to root the ZTE Blade (SMART Netphone)

Hi there, I've had a lot of inquiries regarding the newest android phone from SMART, the Netphone701. This includes how to root the device. But what is "rooting" actually? And what can you get from a rooted phone?


Well, rooting your phone simply means being able to have administrative access (and therefore, total control) on your android phone. It's like having administrator rights on your windows pc or superuser access on linux machine. Android is an operating system for mobile devices such as smart phones and tablet computers. It consist of a kernel based on linux kernel. So, if you are familiar with Linux OS, working with android shell is like working with linux. It's not always necessary to have root access, but besides being cool (especially for tinker fairies like me), it allows you to install useful applications not available on non-rooted phone. One such application I like is the Titanium backup. Well, it's just another backup utility but since it requires root access, it can do more than just secure your backup, that's a complete backup of your apps and application data. If you visit the market often, you might have stumbled upon a really cool app but, it requires root access. If you wanna try it, read on.

Disclaimer:
If you should attempt to follow this guide, please note that the author will not be held responsible for whatever abnormal operation (software / hardware) your mobile device might experience after tweaking it. The procedure involves using soft wares from android development communities and maybe considered unknown or untrusted by your mobile operator. Also, please note that this procedure automatically voids the warranty of your phone, so if you're completely unfamiliar with what are you doing, I suggest that you don't try it.


OK, let's get it on.
First, you'll need these soft wares (I recommend downloading them from the links below).


1) rageagainstthecage-arm5.bin & 
2) Superuser package
http://wiki.cyanogenmod.com/wiki/ZTE_Blade_(Gen2):_Root_and_Recovery
3) ZTE Blade Windows Drivers
http://support.zte.com.cn/support/uploads/ZTE_Android%20USB_Driver_For_Microsoft_PC.rar
4) Android SDK 
Just follow the procedure on how to install adb shell. Alternatively, you can just google how to get adb server running on your pc, after all, you don't really need the whole SDK package if you're not an android developer.Read more here:


http://developer.android.com/sdk/index.html

I suggest storing all the files in one location, preferably the \tools folder of the SDK path.
     C:\Program Files\android-sdk_r10-windows\android-sdk-windows\tools
Now we're good to go.It's a relatively simple procedure if you have your pc setup just right. I provided some screenshots for easy reference. Just click on the pictures to enlarge.


First, set your phone debugging and unknown software installation options from the settings page. Make sure both options are checked.


Next, verify that adb server is properly installed. On the command line, type:
>adb start-server
This should display the output that looks like this:


Verify that the phone is connected and recognized by your pc. To do this, type the following commands on the command line.


>adb devices


This should display the output that looks like this:
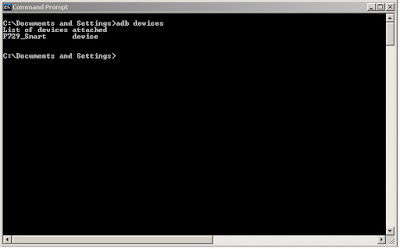
 
If the phone is connected and recognized by your pc,then run the following commands. Please look at the screenshot below for the summary and output of the following commands.

2)
>adb push rageagainstthecage-arm5.bin /data/local/tmp/
3)
>adb shell 
4)
$chmod 755 /data/local/tmp/rageagainstthecage-arm5.bin 
5)
$/data/local/tmp/rageagainstthecage-arm5.bin

Once the exploit finishes, in terminal, run the following commands: 

6)
>adb kill-server 
7)
>adb start-server 
8)
>adb shell 

NOTE: As you enter the adb shell, you should see a "#" at the command prompt. If you see a "$", then the exploit didn't work, please repeat steps 2-5. Else, proceed to the next step.

9) 
#cd /system
10)
#ls

NOTE: If you see xbin at the output, perform the next command,if not, proceed to step 12.

11)
#mv xbin xbin.bak
12)
#mkdir /system/xbin
#exit
>adb push su /system/xbin/ 
>adb shell chmod 4755 /system/xbin/su 
>adb push Superuser.apk /system/app/

Below are some screenshots of what we've done so far. These will show the commands and the output. Click on the picture to enlarge. As you may notice, the windows directory is different, that's because I opted to install the SDK files to a different directory.Just make sure that the required soft wares are in the current directory in the command line as you perform the procedure. 


Congratulations! you're  done. You now have root access on your Netphone. Verify this by installing root checker app by joeykrim from the android market. 


Now you can install apps which require root access. Just be sure to allow the application as it requires root access elevation.You now have the superuser app installed on your phone, click on it to see apps with root access.


Here are additional screenshots before and after the rooting procedure.


Installed titanium backup which requires root access.


Enjoy your rooted Netphone, please follow & comment.
God Bless!


https://web.facebook.com/theengineerisin

Friday, December 2, 2011

SMART Mobile Eye Battery Replacement

It's a Saturday, another great day for a weekend project.

Lately, I've noticed that my "SMART Mobile Eye" is always turning off even after a full night of charging. After more than 3 years of good use, we'll it's very obvious that it needs battery replacement. I tried looking for a repair center but with no luck. Some people are not even familiar with the mobile eye. Well, what is a mobile eye anyway?

Mobile Eye is a Digital Life solution offered by SMART Comm. Inc., the Philippines' leading wireless service provider. Simply put, this gadget enables you to remotely monitor you household, business or anything you value the most just like a CCTV camera on your mobile phone. Anywhere you have a good 3G signal, ensuring security is just as simple as a video call. This device is very simple but it has a lot of cool features. One of the coolest feature I like is that you can pan & tilt the camera using the keypad on your mobile phone. This enables a wider range of view unlike expensive CCTV installations that only has a steady view. You can even use it like an ordinary phone because it has a built-in speaker and microphone. Another cool feature is it's infrared camera, yes, you can see everything it covers even in total darkness. It also enables you to record what it sees for a preset time of the day, stores it in a T-Flash memory card which you can download and view at a later time.As for me, I installed it a "strategic" location in our apartment just so I can monitor how my cute little girl is doing every time me and my wife is out. With the pan & tilt feature, I can adjust the view to cover almost 70% of our home. I can hear the conversations and even say hi to my baby. OK, I guess the next thing you want to know is "How much do I spend for all these neat features?" The answer, almost nothing. As I've mentioned earlier, It's just like another video call (which I usually use, so the standard rates apply) especially if your on a postpaid account. You can use any Sim card (postpaid or prepaid) provided by SMART for the device and you just have to ensure it doesn't run out of credit. I just have to load it Php 1 every month to ensure continuous service.

You can read more on http://smart.com.ph/corporate/newsroom/SmartUnveilsDigitalLifeSolutionMobileEye.htm

http://smart.com.ph/corporate/support/FAQs/MobileEye.htm

So, let's get down to the MacGyver stuff. Please be reminded that I'm not responsible for anything that might happen to your Mobile Eye if you should attempt to repair it. Moreover, SMART may void the warranty if you attempt to tinker with the device so if you think yours is still under warranty, I suggest you inquire with SMART first. As I've mentioned earlier, mine has more than three years of good service so I think it's way off the warranty period. Besides, I don't want any repair or replacement charges so I took the risk of doing the repair myself. And so,after a successful procedure (It's been doing OK for a month now), I thought of sharing what I've done on my blog, this might be be helpful for some other tinker fairies out there.

OK, here we go, below this is the mobile eye fully assembled.

Oh by the way, you'll also need a precision screwdriver, tweezers, side cutter and a soldering iron for the repair. On the picture, you can see the mounting bracket.It looks like an astronauts helmet showing the camera, the infrared LED's, the status light indicator & the microphone holes on the front and just on the left side is the speaker. OK, just look at the pictures for the tear down procedure.


First, remove all the screws. All screws are covered by a plastic sticker or a rubber stopper, just pry it using tweezers before removing the screws. There are four screws on top & four on the bottom.


After slightly opening the enclosure, you need to remove two screws just above the camera mounting  and the two screws on the infrared LED's to be able completely remove the enclosure and easily pull out the battery. Now you can separate the enclosure in half. Be careful in doing this to avoid pulling on some cables connecting the front LED's, microphone & speaker.


Now here is the complete tear down, you just have to gently pry the microphone, infrared LED's and the speaker from the enclosure. The battery is the circular pattern on the bottom of the camera assembly with the gray and white cable sticking out, we will pull this out later.


Now before pulling out the battery, disconnect it from the main board. Follow the gray/black connector and gently pull on the connector from the main board. Then pull the battery out from the assembly.


Okay, we're halfway done. Below is the view of the original battery and the replacement battery. 


So where did I get the replacement battery? After some googling, I discovered "Battery Zone" located in Farmers Center Cubao, QC. I brought the original battery and they offered me a replacement with the same specifications, it's around Php500. They will offer the option of reconnecting the connectors but that would take days (and a service charge) so I opt to do it myself instead. You may also try on "Battery Channel" stores located on some malls.

So now it's time to replace the battery. First you have to transfer the connector. You can use a cutter to strip off the covering of the old battery (note the polarity of the terminals). This will expose the small PCB with some electronic components attached to the side of the battery. Then, you can use the side cutter to pry off the metal connectors from the battery terminal.


As you can see, the original battery is really in bad shape. It already leaked and that's the reason why it will not hold any charge. A simple voltmeter test confirms this. Also, the terminals are corroded as well as the circuit board which I also suspect some damage. Anyway, I just cleaned it with alcohol.


After cleaning the battery circuit board, I'm just hoping that it was not damaged by the corrosion. And so, using a soldering tool, I soldered the circuit board (again, noting the correct polarity) to the new battery.  I just  secured it using electrical tape. Now here's the circuit board attached to the new battery.


Then, you just have to re-insert the battery to the main assembly. Then re-connect the battery cable to the main board.


As you may have noticed, the final assembly of the battery is a bit different from the original setup. After a quick test, it turned out that the battery circuit board is damaged by the corrosion and is not working properly. And so I thought of removing the circuit board and connecting the battery directly to the circuit board, and it worked just as well. The circuit board attached to the battery is just an added "protector" for the battery against over-charging or thermal runaway but the main board itself controls the charging so it's okay to remove it. Nevertheless, I recommend not always doing this if the circuit board is not damaged. As I've said, it provides added protection for the battery.

After re-assembling the unit, it's charging perfectly using the supplied charger, but a test call confirms all is working fine. Below is the unit starting up (white light indicator on) and charging (blue light indicator on).


The charging automatically stops after about 8 hours and the unit lasts  for up to one week on standby depending on how often it is used.

Now that was a lot of fun, and a lot of savings. If you have further inquiries, please follow me or you may send it on my profile email.I might be able to help you.

Have a nice day, God Bless!

https://web.facebook.com/theengineerisin

Saturday, October 1, 2011

Netphone Tips & tricks

 I just got my Netphone, and so, I'm already missing my Samsung Galaxy Tab. Why? because I can do all the things on my Netphone like the tab, so I prefer of using it more often. This unit definitely is a good one for the Smartnet / Netphone service, so I suggest you really must try it. It's both android so I had no problems with the Netphone taking over my tab. But for Iphone users, I think they'll be missing a lot of stuff.
 So, if you're a loyal Iphone user, would you just love it if you can have the same interface over the netphone? As we all know, Iphone and Android (Netphone) are very different phones so I thought of mixing the two flavors if it will work out. Turned out, well, maybe not perfect but it looks good. So here's a short video on how you can customize your Netphone's interface to look like an Iphone. Sorry for the crappy video, I'll try and improve on that on my future posts.


Here's some cool screenshots:


 So, there you have it. I hope you enjoy more  features of your Netphone. I'll post other tips and tricks to make the most out of your Netphone. That's all for now, good day.

Thursday, September 15, 2011

Delivering "The Best Service"...it matters

 There goes my mobile phone,screaming like "It's Monday morning,wake up sleepy head and prepare for work!". As soon as I reach out to snooze it, I'm already seeing myself in front of my computer analyzing the Weekly Service Surveillance Report. In all my years of being an employee,I learned that it's more stressful resisting on doing the things you have to do than doing it right away. So I always tell myself  "It's no big deal,I'm used to it." And so, my day goes on like any other Monday.
 Reports were done before my afternoon break. Then, I received an email message informing me that I have a training to attend to, the next day. I was like,"What's this? Service Desk Analyst?." I'm thinking, oh, another one of those mind-setting, brainwash kind of training to make me a "better employee." After some last minute modification of my schedule for the week, I was all set-up. We'll at least I'll have sometime away from my desk,sitting in a hotel chair, pretending to listen from a boring instructor while checking on my facebook account. But in the back of my mind, I 'm hoping this training would be different for my superior told me this will make me a certified Service Desk Engineer. And so, all of my expectations were tested the following day.

 First day,I arrived late with a ton of sweat all over me. Good thing we have this nice room with overflowing coffee and very nice people . So I quickly "cooled" down over a hot cup of coffee while browsing this book which is in my impression, kind of thick for this training. I'm wondering if we'll be able to finish covering the topics in this book for three days.After about 10 minutes, I'm settled and it's game time. There was this tall young lady speaking in front of us introducing our trainer. Obviously she's not a native Filipina but I'm really glad that I'm able to understand what she's saying. This made me feel even more comfortable, at least I will not be having a hard time listening, I just have to understand. From then on, I'm sure I'll learn something from this training. And so,there goes "Chris", our trainer. I really didn't get his real name the first time, always was the case every time I go on a training session with foreign trainers. First impressions, oh great, a man who looks like he really know what he's talking about. I was glad to hear Chris said "We're all in good hands". And so, after a bit of introduction and acquaintance with the rest of the class, It's all down to business. But before that, we had this mock exam, I'm glad I got a passing grade (wish this was for real already). That got my my confidence a notch higher that I can pass the actual exam.We go on discussing roles & responsibilities, effective communication, skills and competencies. After the first session, I've come to realize many things about being a Service Desk Engineer, "It's not as simple as you might think". The day ends and I'm looking forward for the next session.

 Day 2, I don't know if I'm excited or what but I'm really early this time. So early that I had enough time to go to a chapel and thank the Lord for the blessings. I was the first one to arrive, and so I just did the morning routine over a cup of coffee. Right now I'm even more comfortable with the rest of the class so I had a nice time doing all the activities set for the day. We discussed cross-cultural communication, process management and the service desk environment for the training proper. We had a chance of talking with Chris about other things (politics, culture, cost of living, etc.) during our break, I want to call it my "yosi break" (cigarette break). It was another good acquaintance session.The food, by the way, is really good too. I was a little disappointed knowing we will not be actually taking the exam as part of the training, but then I just focused on being able to pass, learn and be a certified Service Desk Analyst. And so, the day passed by with me having a greater realization of what this training, really, is all about. It's not about the exam or anything, it's about delivering the best service whatever is your profession.

 Last day, is was the perfect timing. That's my perfect example of learning for the past two days. We discussed about Problem solving, tools and technologies and managing SLA's. Had a lot of fun doing the activities set for the day. Then we had another mock exam, this time it's a different story. The questions are much tougher and the answers must really be precise. But this is what you have to expect if you are to get a certification. Felt a bit down when  I wasn't able to get a passing grade (short of one correct answer to be exact). I'm hoping to leave a good impression to the rest of the class but maybe not this time. I guess I have to try harder and do better on the actual exam. That's another good lesson for me. At the end of the day, It's all about attitude, how you react will depend on how you see the things around you. If you want to deliver good service, then you must first be able to see good things on what you have and what you can do.


Service Desk Analyst Training
New World Hotel, Makati Phil.
Sept. 13-15, 2011
Trainer: Prakash "Chris" Christiansen

Sunday, September 11, 2011

SmartNet & Netphone...

The newest service from SMART Communications, SmartNet, is finally here. This service is now available on the new Smart Netphone. Built on ZTE blade mobile unit, this service is bound to change the way subscribers use social networking and mobile data communications. Of course, basic services like SMS,Voice & MMS are included.

So what is SmartNet?


It's a Saturday, I should be at home trying to having some time with my little girl, but then, I'm in the office and it's all hands on deck. It's not something unusual for me, I've been in this business for more than ten years so it's just another saturday in the office. But this day is different, this marks a new beginning in mobile communications technology as we launch our newest service, SmartNet & the Smart Netphone. So what really is SmartNet?

I go around my workplace asking my office mates, "O, may smartnet account ka na ba?" then I get the usual reply, "Ano yun?". And so, I go on explaining for the next 60 seconds on the basic details of the service. Then I get comments like, "Talaga,ok yan ah, try ko nga!". You can visit our site by clicking on SmartNet link above.

Ano nga ba ang SmartNet?

 SmartNet is the newest Social Networking Service (SNS) from SMART. Along with the Netphone, this service offers a lot of convenience to mobile subscribers using social networking as their way of life. This is also available via Internet. The web interface offers full access and customizations but it is updated along with the widget running on the Netphone. Simply put, it's just another Facebook, Twitter or Google+ service, but there's more. Not only does it combine your social networks into one but it also comes with features offered only by the largest telecom company in the country. Using SmartNet, you can update your social networks with ease and convenience using the Netphone.It is built with SMART's own applications that makes complicated tasks easier with a touch of an icon. The technology behind this service is truly amazing. You'll be able to enjoy mobile chat, posting Twitter & Facebook updates for free (using Netphone messenger & Social Stream)* anytime, anywhere.

The NetPhone Interface:


 The Netphone homepage uses the SmartNet widget which shows your current updates. Information is updated along with your SmartNet profile on the Internet. A press of a button shows you your current balance and other info. Built-in icons make chatting, email, SMS and SNS updates a breeze. A press of a button shows you your current subscriptions and service status.

 Another cool feature of NetPhone is the Net Setting widget. This widget let's you control the connectivity of the phone so as to prevent unwanted data charges. A simple touch of an icon enables Internet or safe browsing mode.


 Of course, basic services like Voice call, SMS and MMS are available. Additional features like FX are also included. I will share additional details on these services, including  the overall user experience,browsing speeds & network related issues on my next post. More features will be available soon for the service is under continuous development. For now, I invite you to try it out.


The mobile unit. - NetPhone701


On a personal note, my overall impression is good if not the best for the choice of unit. This unit compares pretty good against my 7" Samsung Galaxy Tab.

Pros:

Don't be fooled by just looks, this phone has a lot of features considering it's only around Php9K in the market. It's actually a ZTE Blade unit.I like to agree on Sam Pinto's "this is one sexy phone". I like the fact that this this phone can do most of the things that I consider a "high end or high profile" phone can do. This unit is a 2G/3G multi-band (GSM 900/1800/1900 HSDPA 900/2100) phone. Weighs around 110g with bright and crisp 480 x 800 pixels, 3.5" AMOLED capacitive touchscreen display. Also comes with Wi-Fi, USB and bluetooth for connectivity. It has a 3.2MP camera which is enough for really good pictures in lit environments. It's equipped with 600 MHz ARM 11 processor, Adreno 200 GPU, Qualcomm MSM7227 chipset, running Android 2.2 Froyo OS. And to top it all, this unit also has GPS functionality,FM radio,150 MB of storage, 512 MB RAM, 512 MB ROM and an expandable 2G microSD memory card for storing music, videos and other files. One unique feature I really appreciate on this unit is USB and WIFI tethering, meaning this unit can share it's mobile data connection via USB connection or act as a Wi-Fi hotspot. Now how cool is that! And by the way, this unit can also play HQ YouTube videos and music sounds good enough.User Interface is the basic android stuff with home,back,menu,volume side keys and power/display keys. Battery life is on the average,but if you're a "tweaky" user like me, or if you love angry birds,then travel charger at hand is a must. By the way,this unit also charge via any USB port (but slower than the wall-charger), that's another good feature.

Cons:

Well, you can't just have it all. First of all, the camera has no built-in flash, so you won't be able to snap a pose with your friends while hanging out on a dim corner of your favorite bar.But hey,this is no camera (it's a phone). Another thing is some lack of responsiveness from the touchscreen though it may be capacitive. Sometimes,you have to really put a little effort to try and slide those menus up and down. But I think this is due to the fact that it only has a basic processor to accommodate all of what you're trying to do at the same time. GPS drains the battery easily so i recommend you use a mobile charger when using this device with the built-in navigator.

That's all for now, watch out for the latest updates on my future posts. Thanks!

*Terms and Conditions Apply